API Tip #4 04/10/2002
We're back again for yet another API tutorial. This time we will be adding on to the last API tip (Custom Properties Tutorial).
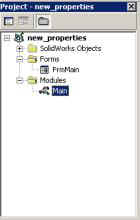
| Adding the User Form Download the finished code here. For the next step in the process, we want to give the user control over the value of custom properties entered. To do this, we'll add a user form to our macro. Because this is a stepping-stone to the next section, make a copy of your macro. Copy the macro as properties_form.vbp and then edit it. Add a user form with a ListBox control , a TextBox control and a CommandButton control . I have modified the properties of the CommandButton to have the caption "Apply". |
 |
This macro will not be used to enter new properties, just to change existing properties. The next section will add functionality to add and delete custom properties.
Code ChangesAfter adding the user form to the macro, switch to the Main module by double-clicking on it from the Project window. Change your code to match the following.
|
 |
Public swApp As Object
Public Part As Object
Public MyProp() As String
Sub Main()
'Connect to SolidWorks
Set swApp = CreateObject("sldworks.Application")
Set Part = swApp.activedoc
If Part Is Nothing Then
MsgBox "No current document", vbCritical
End
End If
Load FrmMain
Dim i, x As Integer
'Get the properties from the file
i = Part.GetCustomInfoCount2("") 'get the number of custom properties
If i = 0 Then
MsgBox "No properties found."
End
End If
'set the array size to the number of custom properties
ReDim MyProp(1, i - 1)
'fill the array with the custom property names
For k = 0 To UBound(MyProp)
MyProp(0, k) = Part.getcustominfonames2("")(k)
Next k
'fill the array with the custom property values
For x = 0 To i - 1
MyProp(1, x) = Part.CustomInfo2("", MyProp(0, x))
Next
'Fill the properties into the form's list
Dim j As Integer
For j = 0 To i - 1
FrmMain.ListBox1.AddItem MyProp(0, j), j
Next j
FrmMain.ListBox1.ListIndex = 0 'set the first item in the _
list to be active
'show the corresponding property value in the text box
FrmMain.TextBox1.Text = MyProp(1, FrmMain.ListBox1.ListIndex)
FrmMain.Show 'show the main form
End Sub
Form Management
There are a couple lines of code that will control the form's general behavior. The first line is FrmMain.Load. This code loads the form and its associated controls into memory so that properties can be set and methods can be used. It does not make the form visible. At the end of our code module we've added the line FrmMain.Show to accomplish this. This process is common with Form objects, but is not absolutely necessary. For example, we could have substituted the Show method for the Load method and taken care of the process in one step. The only difference would have been when the user sees the interface. This only makes things look cleaner when you have a lot of information to be processed prior to showing the form. It prevents the user from seeing the form flashing and changing as it loads up.
Public Dynamic Arrays
The first thing you will notice is that we've moved the declaration of the array MyProp() to the general declarations area. We've also changed its declaration to Public so that it can be accessed outside of the current procedure. The declaration also has not defined the size of the array. This is important now. How could we lock the user to having only a fixed number of custom properties? By not declaring the size of the array we have just made it dynamic. This means it can be changed at any point in the process.
Reallocating Array Size
The next step in the process will be to see how many custom properties the user has added to the part so we know how much room to make in the array. In our example, we get the number of custom properties using the SolidWorks method GetCustomInfoCount2(configuration name). We then are storing that value in the integer i. For good housekeeping, we've also added a check to see if there are any custom properties. If there aren't, we end the macro.
To set the size of the array we use the ReDim statement. You can think of this as re-declaring the array. The benefit is that we can resize the array according to our needs anywhere we want. The only thing we can't do with ReDim is change the type of data stored in our array. Since we declared it initially as a string type, we don't need to specify the type again. Don't forget that we count arrays from zero. That's why we need to give it the size (1, i - 1). It is now a 2 by i array if we are counting from one (I know this gets confusing).
Filling the Array
Rather than manually filling in the array with values as we did in the first half of this exercise, we want to get them from our SolidWorks document. So we've used another For loop. First, we've used the UBound VB function to get the upper bound or size of the array as the stopping point of the loop. In other words, we'll get the number of items in the array. You might be thinking, why didn't we just use i - 1 as the stopping point? The answer is, we could have. In fact, we do later in the macro. But if we did that you wouldn't know about the UBound function! Isn't using functions more fun anyway? Next, we used the GetCustomInfoNames2 method to access the names of the properties. In our example, the first empty string passed to the method refers to the configuration. If you pass a configuration name here you will get configuration specific properties returned. If you pass an empty string as we have you will get the general custom property. The second item passed defines which custom property we want. Without this integer, we would have an array of property names rather than individual property names to fill our MyProp array.
It is often helpful to think of a two dimensional array as a simple matrix. Making a quick table can help ease the process of managing new arrays. The following table is a sample of what we might have in the current example.
|
MyProp Array |
0 |
1 |
|
i - 1 (0) |
"LastSavedBy" |
empty |
|
i - 1 (1) |
"CreatedOn" |
empty |
|
i - 1 (2) |
"Revision" |
empty |
|
i - 1 (3) |
"Material" |
empty |
Now we need to fill in the property values of our array. The next For loop fills in the second dimension (or column) of the array with this information. The method used to access the information is CustomInfo2. This method also requires passing the configuration name for configuration specific properties, or an empty string for general properties. It also requires passing the property name for the corresponding property value. For example, if we wanted to access the value of the "Material" property we would use Part.CustomInfo2("", "Material"). This would be great if we always knew exactly what custom properties were always used. Rather, we would like the code to be generic enough to handle any custom property. Notice how we make use of one dimension of our existing array to populate another dimension. MyProp(1, x) = Part.CustomInfo2("", MyProp(0, x)). After this for loop our array is now completely populated with information.
Filling the ListBox Control
Please remind me why we gathered all of the information in the custom properties of our part. I've forgotten. Ok, we want to display all of the property information to the user so they can eventually edit the information in a simple window. So now we enter the area of user interface commonly refered to as UI or GUI (graphical user interface).
Again we make use of a loop to fill in the ListBox control with the property names. Essentially, a ListBox control is a graphical container for arrays. Most programs have ListBox controls to display lists of items that can be accessed by the user. These types of controls are called ActiveX controls. They are pre-fabbed chunks of code to execute the most common tasks. They are also what make Windows programs all look and feel the same way. The biggest benefit from ActiveX controls is that you don't have to program your own user interface tools.
The ListBox control has many of its own methods and properties. The method we're using in our example is ListBox1.AddItem. When using the AddItem method you must pass the value of the list item and optionally the location. We've added the location to ensure the proper placement of the list item values in the list.
Another line of code has been added to cause the list to default to the first item in the list. This is the ListIndex property. This property is useful for setting or getting the currently listed item number counting from 0.
This much code shows us a list of the possible custom properties. We would also like to show the value of the properties by setting the TextBox control to the value of the currently selected list item. We set the default value by setting the Text property to the value of MyProp at the location of the ListIndex. Remember that the ListIndex can get or set the current ListBox item. In this case we use it to get the value to access the corresponding value from our array.
To finish off our UI, we've used the Show method to actually make our user form visible to the user. It's like turning on the light switch at the surprise party after all the preparations have been made.
User Interactions
We've just built the outer body of our tool. Now it's time to fill in the guts. We need to be able to make edits to our property values and then store those changes back in our SolidWorks file. The ActiveX objects are going to help us perform the needed task of processing the user's interactions.
Switch to the view of FrmMain by double-clicking on it in the Project window under the Forms folder. Then right-click on the ListBox control and select View Code.
| By default we see the Click procedure for the ListBox object. The two pull-down lists at the top of the code window can be used to generate procedures for different user interactions for each control on the form. The code we need to add is as follows. | 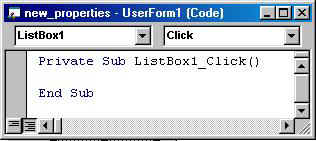 |
Private Sub ListBox1_Click()
FrmMain.TextBox1 = MyProp(1, FrmMain.ListBox1.ListIndex)
End Sub
As the user clicks in the ListBox control it changes the ListIndex property of the same control. This line of code ensures that the TextBox control will always display the correct array value from MyProp that corresponds to our ListBox.
Let's introduce some editing into our program. If the user types in a new value into the TextBox control we need to be able to change the array value as well. I've chosen a simple Enter on the keyboard to signal the program to set the Text value of the TextBox control to the array. This will help illustrate the ability to recognize user input on the keyboard in our ActiveX controls.
Select the TextBox control from the top-left pull-down list of the FrmMain code window. Select KeyDown from the pull-down list on the right. This will initiate a procedure that activates when a key is pressed down on the keyboard. This procedure is automatically passed some very useful information. It is a variable named KeyCode. This is an integer value of the Ascii key code for the key being pressed. Each key of the keyboard has a unique integer. The Enter key will return the integer 13. It also passes whether the Shift key was pressed before pressing the key. Our goal is to recognize only when the user has typed the enter key and save the text of the TextBox to the array when they do. This requires a simple If statement.
Private Sub TextBox1_KeyDown(ByVal KeyCode As MSForms.ReturnInteger, ByVal Shift As Integer)
'on enter
If KeyCode = 13 Then
'set the property value
MyProp(1, FrmMain.ListBox1.ListIndex) = TextBox1.Text
KeyCode = 0
End If
End Sub
We check to see if the KeyCode is 13. If it is, we set the appropriate value of the array to the Text property of the TextBox control. We also need to set the KeyCode to 0. This causes the TextBox control to ignore the Enter key being pressed. We got all we wanted out of it.
This If statement we just created can be spruced up a bit to do a little more for the user. For example, the following code causes the next item in the list to be activated after pressing the Enter key. If the last item in the list is active when the user presses Enter, it activates the first item in the list.
Private Sub TextBox1_KeyDown(ByVal KeyCode As MSForms.ReturnInteger, ByVal Shift As Integer)
'on enter
If KeyCode = 13 Then
'set the property value
MyProp(1, FrmMain.ListBox1.ListIndex) = TextBox1
'if not end of list
If ListBox1.ListIndex < ListBox1.ListCount - 1 Then
'move to the next item in the list
ListBox1.ListIndex = ListBox1.ListIndex + 1
Else
ListBox1.ListIndex = 0
End If
KeyCode = 0
End If
End Sub
Making Things Stick
The last thing we need to do to make our project function is to save the information back to our SolidWorks file. This is where we will make use of our CommandButton control. We've seen how this works before. I've added the following code to save the array information back to the SolidWorks file.
Private Sub cmdApply_Click()
Dim x As Integer
For x = 0 To UBound(MyProp, 2)
Part.CustomInfo2("", MyProp(0, x)) = MyProp(1, x)
Next
End Sub
Our macro is now ready to be used to modify custom properties.
Look for the next installment that will add and delete custom properties! By the end of this series you'll also be able to copy properties between files! Now that will be something SolidWorks doesn't do.
Mike Spens
mikespens@solidworkstips.com
HUNDREDS MORE VIDEOS AND TIPS IN THE MEMBERS AREA. SIGN UP HERE.
